

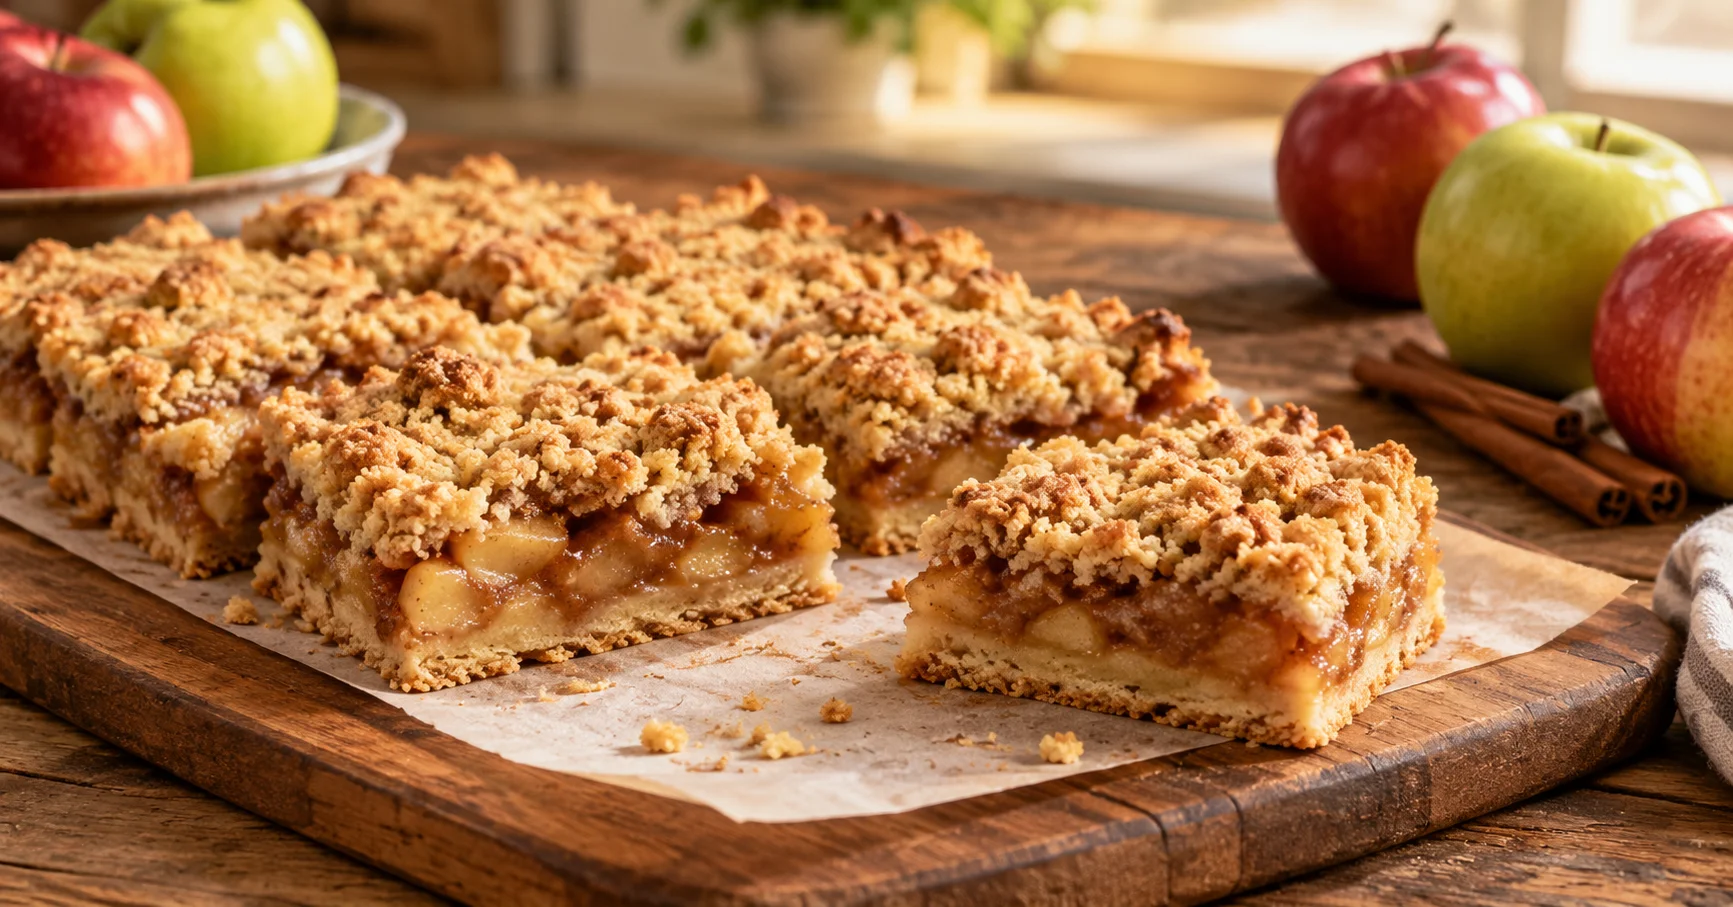
Apple bars are a simple homemade dessert made with tender apples, a buttery crust, and a lightly sweet topping. They are easier to serve than a traditional apple pie and have the same comforting combination of warm cinnamon, juicy apples, and a crisp, buttery texture. These apple bars are especially good for fall baking, afternoon snacks, family gatherings, or an easy dessert when you want something homemade without making a full pie.
The best apple bars have a soft apple filling that is flavorful but not watery, surrounded by a crust that stays firm enough to hold each square. A little cinnamon and vanilla bring out the natural sweetness of the apples, while the buttery base gives the bars their classic bakery-style texture.
Why You Will Love These Apple Bars

Apple bars are one of those desserts that look impressive but are actually straightforward to make. You do not need to prepare a complicated pie crust or worry about shaping a perfect pastry.
The recipe uses simple ingredients that work together to create a balanced dessert. The apples become tender during baking while still keeping enough texture to make every bite interesting. The crust adds richness, and the cinnamon gives the whole dessert a warm flavor.
Another advantage is that apple bars are easy to cut and serve. Once completely cooled, they can be sliced into neat squares or rectangles, making them convenient for parties, potlucks, lunchboxes, and holiday dessert tables.
Ingredients for Apple Bars
For the crust
- 2 cups all-purpose flour
- 1/2 cup granulated sugar
- 1/2 teaspoon salt
- 1 cup unsalted butter, softened
- 1 teaspoon vanilla extract
For the apple filling
- 4 medium apples, peeled, cored, and thinly sliced
- 1/3 cup granulated sugar
- 2 tablespoons all-purpose flour
- 1 teaspoon ground cinnamon
- 1/4 teaspoon nutmeg
- 1 teaspoon lemon juice
- 1 teaspoon vanilla extract
For the crumb topping
- 3/4 cup all-purpose flour
- 1/3 cup brown sugar
- 1/2 teaspoon cinnamon
- 5 tablespoons unsalted butter, melted
How to Make Apple Bars

Start by preparing the oven and baking pan. Preheat the oven to 350°F. Line an 8-by-8-inch or 9-by-9-inch square baking pan with parchment paper, leaving some extra paper hanging over the sides. This makes the finished bars much easier to remove after baking.
1. Make the buttery crust
Add the flour, sugar, and salt to a mixing bowl and stir until evenly combined. Add the softened butter and vanilla extract. Mix until the ingredients come together and form a soft, crumbly dough.
Press the dough firmly into the bottom of the prepared pan. Try to create an even layer so the crust bakes at the same rate throughout.
Bake the crust for about 12 to 15 minutes, just until it begins to look lightly golden around the edges. It does not need to be fully browned because it will continue baking with the apple filling.
Remove the pan from the oven and set it aside while preparing the apples.
2. Prepare the apple filling
Peel and core the apples, then slice them into thin, even pieces. Thin slices cook more evenly and make the bars easier to cut.
Place the apples in a large bowl. Add the sugar, flour, cinnamon, nutmeg, lemon juice, and vanilla extract. Toss gently until the apple slices are evenly coated.
The flour is important because it helps absorb some of the natural juices released by the apples during baking. This gives the finished apple filling a thicker texture instead of leaving liquid around the crust.
Spread the seasoned apples evenly over the partially baked crust.
3. Add the crumb topping
To make the topping, combine the flour, brown sugar, and cinnamon in a bowl. Pour in the melted butter and stir with a fork until coarse crumbs form.
Scatter the crumb mixture evenly over the apples. Do not press the topping down too firmly. Keeping it loose allows it to become golden and slightly crisp in the oven.
Place the pan back in the oven and bake for approximately 35 to 45 minutes. The apple filling should be tender and bubbling slightly around the edges, while the topping should be lightly golden brown.
If the top begins to brown too quickly before the apples are tender, loosely cover the pan with aluminum foil for the remaining baking time.
Choosing the Best Apples for Apple Bars
The type of apple you use can make a noticeable difference in the final texture and flavor. Apples that hold their shape during baking are usually the best choice.
Granny Smith apples are a popular option because their tart flavor balances the sweetness of the crust and topping. Honeycrisp apples provide a naturally sweet flavor and a pleasant texture. Pink Lady and Braeburn apples are also good choices because they offer a balance of sweetness and acidity.
You can also combine two apple varieties. Using one tart apple with one naturally sweet apple creates a more complex apple flavor without requiring additional sugar.
Avoid apples that become extremely soft when cooked if you want the filling to retain some texture. Regardless of the variety, slice the apples evenly so they finish cooking at approximately the same time.
How to Know When Apple Bars Are Done
The easiest way to tell whether the bars are ready is to look at the apples and topping.
The crumb topping should have a light golden-brown color. The apples underneath should be tender when pierced with a thin knife. You should also see some bubbling around the edges of the pan.
If the topping looks finished but the apples are still firm, continue baking for several more minutes. Covering the pan loosely with foil can prevent excessive browning while the apple filling finishes cooking.
Remember that the filling will become firmer as the bars cool. Do not try to cut them immediately after taking them out of the oven.
Cooling and Cutting Apple Bars
Cooling is one of the most important steps for getting clean apple bar slices.
Allow the baked bars to cool in the pan for at least 30 minutes. For the cleanest cuts, let them cool completely before slicing. The apple filling continues to set as it reaches room temperature.
Once cooled, lift the bars from the pan using the parchment paper. Place them on a cutting board and use a sharp knife to cut them into squares or rectangles.
For especially neat edges, wipe the knife between cuts. This removes excess filling and crumbs and keeps each piece looking clean.
Tips for Better Apple Bars
Use firm apples that hold their shape during baking. This prevents the filling from becoming overly soft.
Slice the apples thinly and evenly. Thick pieces may remain firm while thinner pieces become very soft.
Do not skip the flour in the apple mixture. It helps thicken the juices released during baking and prevents the crust from becoming excessively wet.
Press the crust evenly into the pan. A crust that is much thicker in some areas than others will bake unevenly.
Do not pack the crumb topping too tightly. Loose crumbs create a lighter, more textured topping.
Let the bars cool before cutting. Warm apple filling is soft and can cause the bars to fall apart when sliced.
How to Serve Apple Bars
Apple bars are delicious on their own, but they can also be served with a simple topping. A scoop of vanilla ice cream pairs particularly well with the warm cinnamon apple filling.
For a lighter option, serve the bars with a small spoonful of whipped cream or a dusting of powdered sugar.
They can be served slightly warm, at room temperature, or chilled. If you prefer a crispier topping, gently reheat individual portions in the oven before serving.
The combination of buttery crust, soft cinnamon apples, and crumbly topping makes these bars satisfying without needing a complicated garnish.
How to Store Apple Bars
Store completely cooled apple bars in an airtight container. They can be kept at room temperature for a short period, but refrigeration is a better option for longer storage because of the cooked apple filling.
Keep the bars refrigerated and enjoy them within several days for the best texture and flavor.
If you want to serve them warm, place an individual bar in the microwave for a short time or reheat it in a low-temperature oven. Avoid overheating because this can make the crust softer.
Apple bars can also be frozen. Wrap individual portions well and place them in a freezer-safe container. Thaw them in the refrigerator before reheating.
Can You Make Apple Bars Ahead of Time?
Yes. Apple bars are well suited to preparing ahead because they need time to cool and set before slicing.
You can bake them several hours before serving and allow them to cool completely. For gatherings, you can even prepare them the day before and keep them refrigerated.
When ready to serve, let the bars sit at room temperature for a short time or warm individual portions if you prefer a softer, warmer dessert.
Frequently Asked Questions
What are the best apples for apple bars?
Granny Smith, Honeycrisp, Pink Lady, and Braeburn are excellent choices. You can use one variety or combine sweet and tart apples for a more balanced flavor.
Why are my apple bars watery?
Excess moisture usually comes from very juicy apples or not enough thickener in the filling. Tossing the sliced apples with flour helps absorb some of the juices released during baking.
Can I leave the apple peel on?
Yes, but peeled apples usually create a softer and smoother filling. If you prefer more texture, you can leave the peel on, especially when using thin-skinned apples.
Why do my apple bars fall apart?
They may have been cut while still warm. The filling needs time to cool and firm up. Allow the bars to cool completely before slicing for cleaner pieces.
Can I use different spices?
Cinnamon is the main spice, but a small amount of nutmeg works well too. You can also add a pinch of ground ginger for a slightly warmer flavor.
Can apple bars be frozen?
Yes. Cool the bars completely, cut them into portions, wrap them well, and store them in a freezer-safe container. Thaw before serving and reheat if desired.
Apple bars are a simple way to enjoy the flavors of homemade apple pie in an easier, more practical dessert. With a buttery crust, tender cinnamon apples, and a golden crumb topping, they make a comforting treat that works for both everyday baking and special occasions. The key is using firm apples, keeping the filling properly thickened, and allowing the bars enough time to cool before cutting. Once you have the basic method down, this apple dessert is easy to make whenever you are craving something warm, buttery, and full of apple flavor.

Muhammad Ali writes about baking and recipes at kitchinfo. He researches techniques from trusted bakers, cookbooks, and culinary experts, and turns them into clear, step-by-step guides . so bakers of every skill level can get great results without the confusion.