

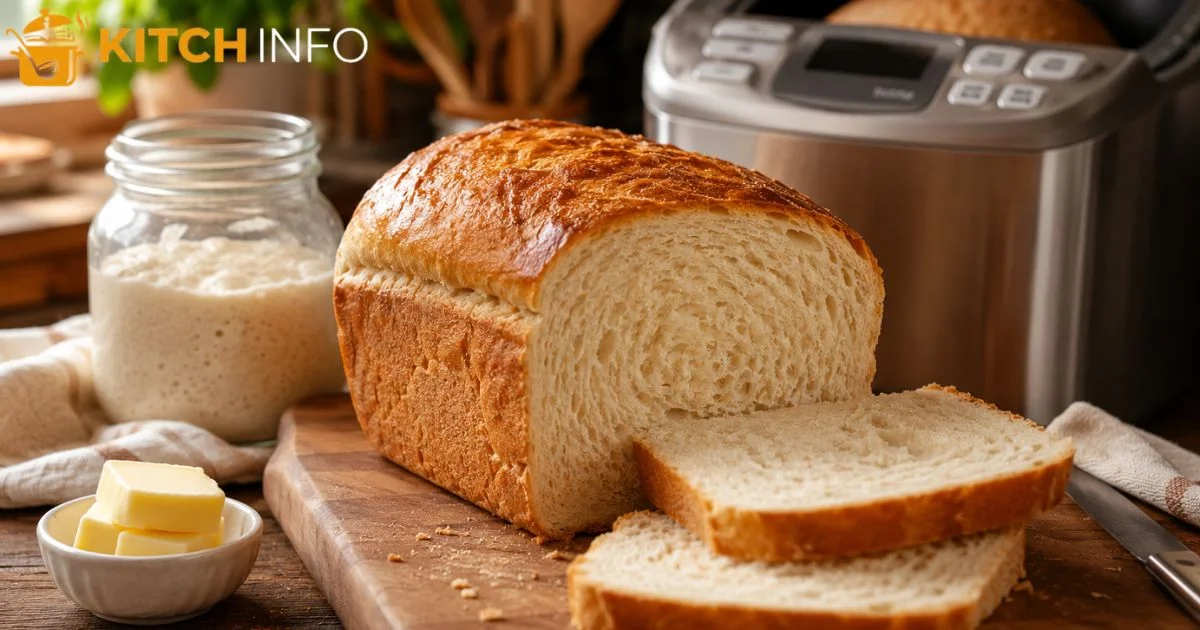
If you want an easy way to enjoy homemade sourdough, this sourdough bread machine recipe with starter is the perfect choice. It combines the rich flavor of traditional sourdough with the convenience of a bread machine, making baking simple for beginners and experienced bakers alike. Using an active sourdough starter, quality flour, water, butter, sugar, and salt, this recipe creates a soft, flavorful loaf with a golden crust. Whether you need fresh bread for sandwiches, toast, or family meals, this foolproof method delivers consistent results. Follow this sourdough bread machine recipe with starter to bake delicious homemade bread with minimal effort and maximum flavor every time.
Why You’ll Love This Recipe

If you have been searching for the perfect sourdough bread machine recipe with starter, you are in the right place. This recipe combines the rich flavor of traditional sourdough with the convenience of a bread machine. Instead of spending hours kneading by hand and watching every stage of the process, your machine handles most of the work while your sourdough starter creates the classic taste and texture that homemade bread lovers enjoy.
Many people think sourdough is difficult to make. While traditional methods require plenty of hands on attention, using a bread machine makes the entire experience much simpler. It removes much of the guesswork while still allowing you to enjoy authentic sourdough flavor.
Whether you are making bread for weekday lunches, weekend breakfasts, or family dinners, this recipe produces a loaf that is dependable, flavorful, and easy enough for beginners. It is designed for home bakers across the United States who want consistent results without giving up the character of real sourdough.
One of the biggest advantages is that you can enjoy freshly baked bread without spending an entire day in the kitchen. Once the ingredients are measured and placed into the machine, most of the work happens automatically.
Wonderful Sourdough Flavor Without Extra Work
Traditional sourdough often requires several rounds of stretching, folding, and monitoring the dough throughout the day. This method simplifies that process.
The natural fermentation from your starter still develops a mild tang, while the machine provides steady mixing and baking. The result is bread with a delicious flavor that tastes homemade from the very first slice.
Perfect for Everyday Sandwiches
Many rustic sourdough loaves have thick crusts and large holes, making them difficult to slice evenly. This recipe creates a loaf that works especially well for everyday meals.
It produces an excellent sourdough sandwich bread that holds together beautifully for peanut butter and jelly, grilled cheese, deli sandwiches, or toast with butter and jam.
Reliable Results Every Time
One challenge with sourdough is consistency. Small changes in temperature, flour, or starter activity can affect the final loaf.
A bread machine provides a controlled environment that helps reduce these variations. Once you become familiar with your machine and your starter, you’ll find that each loaf becomes more predictable.
Great for Beginners
If you are new to sourdough baking, this is one of the easiest ways to get started.
Instead of learning complicated shaping techniques, you can focus on understanding your starter and measuring ingredients accurately. That makes this an ideal first bread machine recipe for anyone beginning their sourdough journey.
Soft Texture the Whole Family Enjoys
Many people expect sourdough to be chewy with a thick crust. While artisan loaves certainly have their place, not everyone wants that style every day.
This recipe creates soft bread that is easy to slice and pleasant to eat while still offering the wonderful flavor that makes sourdough unique.
The crumb stays tender enough for sandwiches while maintaining enough structure to support spreads and fillings.
Less Waste and More Flexibility
Making your own bread allows you to bake exactly what your family needs.
Instead of purchasing loaves that may become stale before you finish them, you can bake fresh whenever your starter is active. Many families also appreciate knowing exactly what goes into every loaf.
A Better Way to Use Your Starter
If you maintain a healthy sourdough culture, you probably look for ways to use it regularly.
This recipe helps you put your active sourdough starter to work while creating something practical that your family can enjoy throughout the week.
What You Need Before You Start

Before measuring ingredients, it helps to understand a few basics. Good preparation makes the baking process smoother and greatly improves your chances of baking a successful loaf.
Fortunately, you do not need expensive equipment or professional baking skills.
A Healthy Sourdough Starter
The most important ingredient is your sourdough starter.
A healthy starter should rise well after feeding and have plenty of bubbles throughout. It should smell pleasantly tangy rather than unpleasant or overly sour.
A weak starter often leads to dense bread because it cannot produce enough natural gas during fermentation.
If your starter has been stored in the refrigerator, feed it several hours before baking until it becomes active again.
Know Your Bread Machine
Every bread maker operates a little differently.
Some machines include a dedicated sourdough program, while others use standard basic cycles. Reading your owner’s manual helps you understand which settings work best.
Even if your machine does not have a sourdough setting, you can still achieve excellent results by selecting the proper cycle and adjusting timing when needed.
Use Quality Flour
Flour plays a major role in the structure of your loaf.
Many bakers prefer bread flour because its higher protein level creates stronger gluten development and better loaf height.
However, all-purpose flour can also work successfully, especially if you prefer a slightly softer texture.
Choose fresh flour that has been stored properly for the best results.
Measure Carefully
Accurate measurements matter much more in baking than in cooking.
Using measuring cups correctly or weighing ingredients with a digital kitchen scale improves consistency from one loaf to the next.
Even small differences in flour or liquid can noticeably change the finished bread.
Check Your Kitchen Temperature
Room temperature affects how quickly sourdough develops.
A warmer kitchen usually encourages faster fermentation, while cooler rooms slow the process.
Understanding your home’s environment helps you recognize whether your dough needs additional time before baking.
Start With Fresh Ingredients
Besides flour and starter, the remaining ingredients should also be fresh.
Fresh ingredients contribute better flavor, improved texture, and more dependable baking performance.
Using high quality ingredients makes a noticeable difference in the final loaf.
Ingredients
The beauty of this recipe is its simplicity. Every ingredient has a specific purpose, and together they create a balanced loaf with excellent flavor, texture, and structure.
The following table explains what each ingredient contributes.
| Ingredient | Purpose |
|---|---|
| Active starter | Provides natural fermentation and develops rich sourdough flavor |
| Bread flour | Creates strong gluten structure and helps achieve better loaf height |
| Filtered water | Provides proper hydration for the dough texture |
| Unsalted butter | Adds richness and creates a tender crumb |
| Granulated sugar | Adds mild sweetness and supports better browning |
| Salt | Enhances flavor and helps strengthen the dough structure |
Active Starter
Your active starter should be recently fed and full of bubbles before you begin mixing.
Many bakers describe the ideal starter as a bubbly starter because it nearly doubles in size after feeding and shows plenty of air pockets throughout.
This level of activity helps create a lighter loaf with better rise.
Bread Flour
Bread flour contains more protein than many other flours.
That additional protein encourages stronger gluten formation, allowing the dough to trap fermentation gases more effectively during rising.
As the dough develops, long gluten strands form and give the loaf its strength and elasticity.
Filtered Water
Many bakers choose filtered water because chlorine in some tap water may reduce starter activity.
Room temperature water usually works well for this recipe.
Unsalted Butter
Adding unsalted butter gives the loaf a richer flavor while keeping the crumb tender.
It also helps create a softer texture that many families enjoy for sandwiches and toast.
Granulated Sugar
A small amount of granulated sugar balances the flavor without making the bread taste sweet.
It also encourages beautiful browning during baking.
Salt
Never leave out the salt.
Salt strengthens the dough, improves flavor, and helps control fermentation for a more balanced loaf.
Sourdough Bread Machine Recipe With Starter
Making sourdough in a bread machine is surprisingly straightforward once you understand the order of ingredients and the basic process.
Unlike fully manual sourdough baking, your machine performs most of the mixing and baking automatically, allowing you to focus on preparing quality ingredients.
Step 1 Prepare the Bread Pan
Begin with a clean bread pan.
Make sure the mixing paddle is securely attached before adding ingredients.
Proper assembly prevents uneven mixing later in the cycle.
Step 2 Add the Liquid Ingredients
Pour the filtered water into the pan first.
Next, add the active sourdough starter and softened butter.
Adding liquids first helps many bread machines mix ingredients more evenly.
Step 3 Add the Dry Ingredients
Carefully add the flour so it covers the liquid ingredients.
Sprinkle the sugar and salt over the flour, keeping the salt separated from the starter until mixing begins.
This approach helps maintain healthy fermentation during the early stages.
Step 4 Start the Mixing Process
As the machine begins working, it forms the dough by combining all the ingredients.
Watch the first few minutes if possible.
The dough should look smooth and slightly tacky rather than dry or overly sticky.
If needed, small adjustments can be made by adding tiny amounts of flour or water.
Step 5 Let the Machine Knead
During the kneading cycle, the machine develops dough strength without requiring manual effort.
The kneading function stretches and folds the dough repeatedly, helping create an even texture throughout the loaf.
Avoid opening the lid repeatedly because consistent temperature helps the dough develop properly.
Step 6 Allow the Dough to Rise
After mixing is complete, the dough rise begins.
Natural fermentation takes longer than recipes made with commercial yeast, so patience is important.
As the dough continues to rise, it should gradually increase in size while becoming lighter and airier.
Step 7 Bake the Bread
Once fermentation is complete, the machine automatically begins to bake the loaf.
During the baking function, the crust develops color while the inside finishes cooking.
When the cycle ends, carefully remove the loaf from the pan.
If your machine allows it, some bakers prefer to remove the paddle before the final rise to reduce the hole left in the bottom of the loaf.
Step 8 Cool Before Slicing
Place the loaf on a wire rack and allow it to cool completely.
Cutting hot bread too early releases steam that is still finishing the interior structure.
Waiting gives cleaner slices and better texture.
Bread Machine Settings

Choosing the correct settings is just as important as measuring ingredients accurately.
Because bread machine models vary, there is no single setting that works for every machine. Learning how your machine behaves allows you to make small adjustments that improve future loaves.
Choosing the Best Cycle
Many newer machines include specialized bread machine settings for sourdough.
If your machine offers one, it is usually the easiest choice.
If not, many bakers achieve excellent results using the standard basic cycle with careful observation.
The overall bread machine cycle should provide enough time for mixing, fermentation, and baking.
Crust Color
Most machines allow you to choose your preferred crust color.
Selecting a golden crust creates a softer exterior that is ideal for everyday sandwiches.
If you enjoy a more robust flavor and firmer texture, choosing a dark crust setting can produce deeper color and additional caramelization.
When Additional Rising Time Helps
Natural sourdough sometimes develops more slowly than dough made with commercial yeast.
If your machine allows pausing between mixing and baking, an extra rise may improve loaf volume when your kitchen is cool or your starter is less active.
Not every loaf requires additional fermentation, but learning when to extend the rise comes with experience.
Tips for the Best Results

Even a simple recipe becomes much more successful when you understand a few practical techniques.
These small habits often make the difference between an average loaf and one that you will want to bake again and again.
Feed Your Starter Before Baking
Always bake with a recently fed starter that has reached peak activity.
An energetic starter produces better fermentation and a lighter finished loaf.
Watch the First Few Minutes
Take a quick look during the initial mixing stage.
If the dough appears extremely dry or very wet, small adjustments are easier now than later in the process.
Understand Flour Differences
Different flour brands absorb water differently.
Even similar flours can vary because of milling methods and protein content.
Learning how your preferred flour behaves helps you make consistent adjustments over time.
Keep the Lid Closed
Once mixing has finished, resist opening the machine unless necessary.
Stable warmth supports healthy fermentation and encourages even baking.
Avoid Cutting Warm Bread
Fresh bread smells wonderful, but patience rewards you with cleaner slices.
Allowing the loaf to cool fully preserves its texture and makes slicing much easier.
Create a Softer Crust
If you enjoy a tender crust, lightly spritz with water immediately after removing the loaf from the machine, then cover it loosely with a clean kitchen towel for several minutes.
Store Bread Properly
Knowing how to store bread helps preserve freshness for several days.
Many bakers prefer using a paper bag for the first day to maintain the crust.
After that, a linen bag or reusable storage bag works well for keeping the loaf soft while reducing moisture buildup.
If you have already sliced the loaf, place it cut side down on a cutting board before storing it to help protect the exposed interior.
With these techniques in place, you are ready to explore additional methods for improving flavor, texture, and long term freshness in the next part of this guide.
Common Mistakes to Avoid
Even a simple recipe can produce disappointing results if a few basic details are overlooked. Paying attention to these common mistakes will help you bake a loaf with better flavor, texture, and appearance.
Using an Inactive Starter
Your starter should be lively before it goes into the machine.
If it has not been fed recently or has been sitting in the refrigerator for too long, it may not have enough strength to raise the dough properly. Feed it ahead of time and wait until it becomes active before baking.
Measuring Ingredients Incorrectly
Too much flour can create a dry, heavy loaf, while too much water may leave the dough sticky and difficult to bake evenly.
Measure carefully each time, especially when working with flour. Small differences can have a noticeable effect on the finished loaf.
Adding Ingredients in the Wrong Order
Most bread machines perform best when ingredients are added in the order recommended by the manufacturer.
Following the correct order helps everything mix evenly and supports proper dough development.
Opening the Lid Too Often
It is tempting to check the bread throughout the process, but opening the lid repeatedly lets heat escape.
A steady temperature helps the dough rise evenly and allows the loaf to bake properly.
Slicing Too Soon
Fresh bread continues to settle after it comes out of the machine.
Waiting until it has cooled gives you cleaner slices and prevents the inside from becoming gummy.
How to Know the Bread Is Done
A beautiful crust does not always mean the inside is fully baked. Checking a few simple signs helps you know when your loaf is ready.
Look at the Color
The crust should have an even brown color without pale or doughy spots.
A well baked loaf should look firm and feel dry on the outside.
Check the Internal Temperature
For the most reliable result, use an instant read thermometer.
Most enriched sourdough loaves are fully baked when the center reaches about 200 to 205 degrees Fahrenheit.
Listen for a Hollow Sound
After removing the loaf from the pan, carefully tap the bottom.
A fully baked loaf often produces a hollow sound, which is a traditional way many home bakers check for doneness.
Let the Bread Rest
Cooling is part of the baking process.
As the loaf rests on a wire rack, the crumb finishes setting, making each slice easier to cut and more enjoyable to eat.
Storage Tips
Proper storage helps preserve flavor and texture while reducing waste.
Since homemade bread does not contain the preservatives found in many grocery store loaves, it is best enjoyed within a few days.
Keep It at Room Temperature
Store the loaf in a cool, dry place away from direct sunlight.
Avoid refrigerating bread because it tends to dry out more quickly.
Freeze for Longer Storage
If you will not finish the loaf within several days, freezing is an excellent option.
Slice the bread before freezing so you can remove only the number of slices you need.
Wrap the loaf tightly to protect it from freezer burn.
Refresh Older Bread
If the crust becomes a little firm after a day or two, warming a slice in the toaster brings back much of its fresh flavor and texture.
Recipe Variations
Once you become comfortable with the basic recipe, you can make small changes to suit your family’s taste.
These variations keep the recipe interesting while maintaining the same simple process.
| Variation | What to Add |
| Honey flavor | Replace the sugar with honey for a mild natural sweetness |
| Whole wheat blend | Substitute part of the flour with whole wheat flour for a heartier loaf |
| Herb loaf | Mix in dried rosemary, thyme, or Italian seasoning |
| Garlic version | Add garlic powder and a little grated Parmesan cheese |
| Seeded loaf | Stir in sunflower seeds, sesame seeds, or flaxseed during the mixing stage |
When making changes, avoid adding large amounts of extra ingredients until you become familiar with how they affect the dough.
Troubleshooting
Every baker occasionally runs into problems. Fortunately, most issues have simple solutions.
The Bread Did Not Rise Enough
A weak starter is the most common reason.
Make sure it is active before baking and give it enough time after feeding to reach its peak.
Cool kitchen temperatures may also slow fermentation.
The Loaf Collapsed
Too much liquid or an overly long rise can weaken the dough structure.
Measure ingredients carefully and avoid making large adjustments unless necessary.
The Bread Is Too Dense
Dense bread often results from underdeveloped dough or a starter that was not fully active.
Checking the dough during the first mixing stage helps catch problems before baking begins.
The Crust Is Too Thick
A darker crust setting or extended baking time can create a thicker crust.
Choosing a lighter crust option on your machine usually produces a softer finish.
The Bread Sticks to the Pan
Allow the loaf to rest for several minutes after baking before removing it.
If sticking becomes a regular problem, inspect the bread pan for wear and lightly coat it according to your machine manufacturer’s recommendations.
Final Thoughts
Making sourdough in a bread machine is an excellent way to enjoy homemade bread without the time and effort of traditional hand baking. By using a healthy starter, measuring carefully, and understanding how your machine works, you can create a flavorful loaf with consistent results.
This recipe is well suited for busy households that want fresh bread for everyday meals while still enjoying the rich taste that makes sourdough so popular. As you bake more often, you will become familiar with your starter, your ingredients, and your bread machine, making each loaf even better than the last.
With a little practice and attention to detail, this sourdough bread machine recipe with starter can become a dependable favorite in your kitchen, giving you delicious homemade bread that your family will look forward to again and again.

Muhammad Ali writes about baking and recipes at kitchinfo. He researches techniques from trusted bakers, cookbooks, and culinary experts, and turns them into clear, step-by-step guides . so bakers of every skill level can get great results without the confusion.