

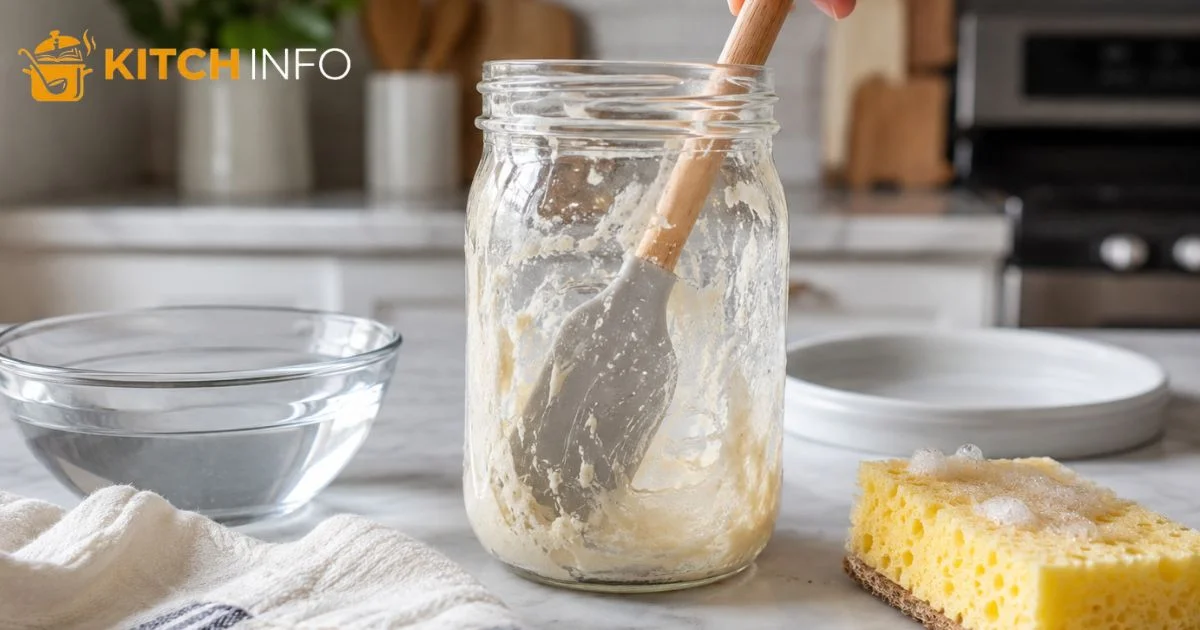
Learning how to clean sourdough starter jar is an important part of keeping a strong and active sourdough starter. A clean sourdough starter jar helps reduce residue, prevents mold, and supports healthy fermentation. Whether you use a glass jar, mason jar, or another sourdough starter container, regular cleaning keeps unwanted bacteria and fruit flies away while making it easier to track your starter’s growth. The best method is to transfer your starter to a clean container, wash the jar with hot water and mild dish soap, rinse well, and let it dry before adding the starter back. Following this simple routine helps maintain a healthy starter that is always ready for baking delicious homemade sourdough bread.
Why Cleaning Your Sourdough Starter Jar Matters

Your starter spends most of its life inside one container. Every feeding leaves behind a little flour paste on the sides, around the rim, and under the lid. Even though the living culture inside is healthy, the leftovers outside the active mixture can become dry, crusty, and difficult to remove if ignored.
A clean sourdough starter jar helps create a better environment for your culture. It also makes your daily routine easier because you can clearly see how much your starter rises after each feeding.
Helps Maintain a Healthy Culture
A thriving starter contains millions of tiny living organisms. These include wild yeast and beneficial bacteria that work together during fermentation. They produce the bubbles that help dough rise and create the rich taste that people love in homemade loaves.
When the jar stays reasonably clean, these helpful microorganisms can continue doing their job without unnecessary exposure to outside contaminants. While the culture itself is naturally acidic and quite resilient, good kitchen hygiene always supports better long term results.
Makes It Easier to Monitor Growth
One of the easiest ways to judge the strength of a starter is by watching how much it expands after feeding. Sticky streaks covering the inside of the container can make those changes difficult to see.
Using a clean starter jar allows you to notice the rise line more easily. This helps you know when your culture has reached its peak and is ready for baking.
Reduces the Risk of Contamination
Food left on the rim or outside of the jar can invite unwanted problems over time. Old paste may collect dust or moisture, increasing the chance of contamination from outside sources.
Although a healthy starter naturally protects itself because of its acidity, keeping the container clean is still one of the simplest ways to reduce unnecessary risks.
Helps Prevent Mold Growth
One concern many beginners have is mold. While mold inside an active starter is uncommon when cared for properly, dried food around the lid or rim can create places where unwanted growth becomes more likely.
If you ever notice fuzzy patches, unusual colors like pink or orange, or strong unpleasant odors that do not resemble normal sour aromas, the culture should not be used.
Keeps Fruit Flies Away
Nothing attracts tiny insects faster than leftover flour paste sitting on the outside of a jar.
Regular wiping helps discourage fruit flies, especially during warm summer months when kitchens are naturally busier with fresh produce and baking.
Makes Feeding Less Messy
A clean container is easier to handle every day.
Instead of scraping through layers of dried paste, you can quickly add fresh ingredients, stir, and close the lid without making extra mess on your countertop.
Supports Better Kitchen Hygiene
Good baking habits extend beyond mixing dough.
Keeping your sourdough jar clean helps maintain an organized workspace and prevents sticky buildup from spreading to shelves, towels, or refrigerator surfaces if you store your starter there.
When You Should Clean Your Starter Jar
Many beginners wonder how often they should wash the jar. The answer depends on how frequently you bake and how you care for your culture.
There is no strict schedule that works for everyone. Instead, watch the condition of the container rather than the calendar.
During Regular Feedings
The easiest time to clean is during feeding starter.
When you remove part of the culture before adding fresh ingredients, simply transfer the remaining active starter into a clean container instead of putting everything back into the same one.
This method only takes a few extra minutes and keeps buildup from becoming difficult to remove.
Every Few Feedings
Many experienced bakers clean the container after several feedings rather than every single day.
If the inside walls remain mostly clean and there is only a light coating near the top, there is usually no need to wash it immediately.
However, once thick layers begin forming, it is time to switch containers.
After Overflow
Sometimes an active culture expands much more than expected.
An overflow leaves sticky paste running down the outside of the jar, around the lid, and across the counter.
Whenever this happens, transfer the starter into a clean container and wash the original thoroughly before using it again.
When the Rim Becomes Sticky
The rim often collects small amounts of starter while stirring.
These spots dry quickly and become hard, making it difficult to seal the lid properly.
Cleaning the rim helps maintain a better fit and keeps the container easier to open.
If You Notice Unusual Changes
Pay attention to anything that seems different.
A layer of liquid called hooch is usually not dangerous. It simply means the starter is hungry and needs another feeding.
However, unusual colors, fuzzy patches, or unpleasant smells deserve closer attention. If you suspect a contaminated starter, it is generally safest to discard it and begin again rather than risk using it.
Before Long Term Storage
If you plan to pause baking for several weeks, clean the container before placing the starter into storage.
Whether you refrigerate it or prepare dried sourdough starter for emergencies, starting with a clean container reduces unnecessary buildup during storage.
After Reviving an Older Culture
If you successfully revive sourdough starter after extended storage, transferring it into a freshly washed container is a good practice.
This gives the refreshed culture a clean environment as it becomes active again.
Supplies You’ll Need

Cleaning a starter container requires only a few simple items that most kitchens already have.
The goal is not to sterilize everything. Instead, you want to remove leftover paste and keep the container clean enough for regular use.
| Supply | Why It Helps |
|---|---|
| Warm or hot water | Softens leftover starter and makes cleaning easier |
| Mild dishwashing liquid | Removes sticky residue and grease |
| Silicone spatula | Scrapes the sides without scratching the container |
| Paper towel | Wipes away loose paste before washing |
| Soft sponge | Cleans the inside gently |
| Dry kitchen towel | Dries the jar before reuse |
Choosing the Right Container
The type of container you use can make cleaning easier.
Many bakers prefer a glass jar because it is easy to inspect and does not absorb odors.
Others choose a plastic container since it is lightweight and less likely to break if dropped.
Either option works well as long as it stays clean and is easy to wash.
Why Many Bakers Like Mason Jars
A mason jar is one of the most popular choices because it is inexpensive, durable, and widely available across the United States.
The straight sides also make it easier to monitor the starter’s rise.
Benefits of a Wide Opening
A wide mouth jar allows your hand or sponge to reach the bottom more easily.
Many bakers specifically choose a wide mouth mason jar because cleaning becomes much faster than using narrow containers.
Picking the Right Lid
Use a tight fitting lid that protects the culture while still following the instructions recommended for your feeding routine.
Different bakers use different methods, but the lid should stay clean and free from dried starter around the threads.
Helpful Scraping Tools
A flexible rubber spatula or similar tool makes it easier to remove every bit of active starter before washing the jar.
This reduces waste and leaves less dried material behind.
Step By Step How to Clean Sourdough Starter Jar

Cleaning your jar is simple when you follow a consistent routine. The process protects your culture while keeping the container neat and ready for the next feeding.
Step 1 Remove the Active Starter
Before washing anything, transfer your active culture into another clean starter container.
Use a scraper to remove as much starter as possible. Every spoonful you save is one less spoonful that goes to waste.
If your recipe calls for removing some culture first, this is also the time to discard starter according to your normal routine.
Step 2 Wipe Away Fresh Residue
Before rinsing, use a paper towel to remove as much sticky paste as possible.
This prevents large amounts of flour from going down the drain and makes washing easier.
Step 3 Rinse with Warm Water
Place the empty jar under warm running water.
The moisture quickly softens leftover flour and loosens any sticky coating that remains inside the container.
Step 4 Wash with Soap
Add a small amount of dishwashing liquid to a sponge.
Clean the entire inside surface, paying extra attention to the rim, threads, and bottom where paste often collects.
There is no need for harsh cleaners because ordinary kitchen soap removes most buildup effectively.
Step 5 Remove Every Trace
Look carefully around the inside wall.
Small amounts of residue may remain near the top where previous feedings reached their highest point.
Wash until the glass feels completely smooth.
Step 6 Rinse Thoroughly
Soap left behind can affect the next batch of starter.
Rinse several times with clean water until no bubbles remain.
Step 7 Dry the Jar
Allow the container to air dry or wipe it with a clean towel.
The inside should be dry before returning your culture.
Step 8 Return the Starter
Transfer the active culture back into the freshly cleaned container.
Add fresh flour and water according to your normal feeding schedule.
If you keep your starter at room temperature, place it back in its usual location after feeding.
Step 9 Continue Your Routine
Continue to feed sourdough starter on your regular schedule.
Consistent care helps maintain a strong culture that is ready whenever you want to begin baking sourdough.
How to Remove Dried Sourdough Starter Residue

Sometimes life gets busy, and cleaning does not happen right away.
When leftover starter dries completely, it can become surprisingly hard. Fortunately, there are simple ways to remove it without damaging the container.
Soak Before Scrubbing
Fill the jar with warm water and let it sit for several hours.
Most dried paste softens enough to wipe away with very little effort.
Avoid trying to chip hardened starter off with metal utensils because they can scratch the surface.
Use Gentle Scraping
A jar spatula works well for reaching the bottom corners of tall containers.
Its flexible shape helps lift softened paste without damaging the inside walls.
Repeat if Needed
Very thick layers of dried starter sometimes require another soak.
Patience works much better than aggressive scrubbing, especially when using glass containers.
Remove Crust Around the Rim
A crusty starter ring often forms where the mixture reached its highest level.
Soaking the upper portion of the jar in warm water usually loosens this ring enough for easy removal.
Wipe the Outside Too
Do not forget the outside of the container.
A slightly damp cloth easily removes fingerprints, flour dust, and sticky spots that collect during daily use.
Prevent Future Buildup
The easiest way to avoid stubborn cleaning later is to wash the jar before paste has time to harden.
Rotating between two clean jars also makes maintenance simple because one can dry while the other holds your active culture.
As your starter becomes stronger and more predictable, keeping the container clean will naturally become part of your baking routine. The next step is understanding how to maintain that cleanliness over time while avoiding common mistakes that can affect your starter’s long term health.
Tips to Keep Your Starter Jar Clean
Keeping your container clean does not require extra work if you build a few simple habits into your baking routine. Small steps taken during each feeding can save time later and help your starter stay easy to manage.
Transfer Instead of Topping Off
Rather than adding new ingredients to the same container every time, move your starter into a freshly washed jar every few feedings. This prevents thick layers from building up and keeps the sides clear.
Wipe the Rim After Every Feeding
Take a few seconds to wipe away any spills before replacing the lid. Fresh starter is much easier to remove than dried paste, and this simple habit keeps the jar looking neat.
Avoid Filling the Jar Too High
Leave enough empty space above the starter so it has room to rise. A container that is too full is more likely to spill over the sides, creating extra cleanup.
Use Clean Utensils
Always use clean measuring tools and mixing utensils when feeding your starter. This helps prevent unwanted food particles or grease from getting into the culture.
Store It in a Good Location
Keep the jar in a clean area of your kitchen away from direct sunlight and sources of heat. A stable location also makes it easier to monitor daily activity.
Clean the Lid Too
Many people focus only on the inside of the jar and forget the lid. Check it regularly for dried starter and wipe it clean before putting it back on.
Should You Sterilize a Sourdough Starter Jar?
This is a common question, especially for beginners. In most cases, the answer is no.
A sourdough starter does not need a sterile environment to stay healthy. It already contains beneficial microorganisms that naturally protect the culture by creating an acidic environment.
For everyday baking, washing the jar with warm water and mild dish soap is enough. Rinse it thoroughly so no soap remains before adding your starter back.
Sterilizing is usually unnecessary unless the jar was used for something that could leave behind unwanted residue or if you are starting over after throwing away a spoiled culture. Even then, a thorough cleaning is often all that is needed.
The goal is cleanliness, not complete sterilization.
Glass vs Plastic Starter Jars

Both materials can work well, and each has advantages. The best choice depends on your baking habits and personal preference.
| Feature | Glass | Plastic |
|---|---|---|
| Easy to see starter growth | Excellent | Good |
| Holds odors | Rarely | May over time |
| Scratch resistance | High | Lower |
| Weight | Heavier | Lightweight |
| Breakable | Yes | Less likely |
| Easy to clean | Excellent | Good |
Glass remains the favorite choice for many home bakers because it stays clear, does not stain easily, and allows you to watch your starter rise.
Plastic containers are practical if you want something lightweight or need a travel friendly option. If you choose plastic, replace it if it becomes deeply scratched or develops lingering odors that cannot be removed with normal washing.
Whichever material you use, keeping it clean matters more than the material itself.
Common Mistakes to Avoid
Even experienced bakers can develop habits that make cleaning harder or increase the chance of problems. Avoiding these simple mistakes helps your starter stay healthy and your routine stay easy.
Waiting Too Long Between Cleanings
Leaving the same jar in use for weeks without washing allows dried layers to build up. Regular cleaning is much easier than dealing with thick, hardened residue later.
Ignoring Small Spills
Starter that drips down the outside of the jar quickly dries and becomes sticky. Wiping spills immediately takes only a few seconds.
Using Damaged Containers
Cracks, chips, or rough surfaces can trap food particles and make cleaning more difficult. Replace damaged jars instead of continuing to use them.
Leaving Soap Behind
Always rinse thoroughly after washing. Any remaining soap can affect the next feeding and may interfere with the natural balance inside the starter.
Using Dirty Utensils
Spoons, spatulas, and measuring tools should always be clean before touching the starter. This reduces the chance of introducing unwanted contaminants.
Forgetting to Check the Lid
A clean jar with a dirty lid is still a problem. Pay attention to the threads, seal, and underside of the lid where dried starter often hides.
Signs Your Starter Jar Is Contaminated

A healthy starter naturally develops a pleasant tangy smell and shows regular bubbling after feeding. The container should also remain clean and free from unusual growth.
Watch for warning signs that suggest the jar should be emptied, cleaned, or replaced.
Visible Mold
Fuzzy patches or colorful growth are never normal. Green, black, pink, or orange spots are strong signs that the contents should not be used.
Strong Unpleasant Odors
A sour smell is expected, but sharp rotten or foul odors are not. If the smell seems completely different from normal fermentation, inspect the starter carefully.
Sticky Film That Will Not Wash Away
If repeated cleaning cannot remove a strange coating from the inside of the container, replacing the jar is often the simplest solution.
Cracks or Deep Scratches
Small cracks can collect moisture and food particles that are difficult to clean completely. Deep scratches in plastic containers may also trap residue over time.
When you notice any of these issues, it is safer to start with a clean container rather than trying to save one that is no longer in good condition.
When to Replace Your Starter Jar
Most quality jars can last for years with proper care, but they do not last forever.
Replace your jar if it becomes chipped, cracked, or difficult to clean. Damage not only makes washing harder but also increases the chance of hidden buildup.
If a plastic container becomes cloudy, stained, or develops persistent odors, replacing it is usually more practical than trying to restore it.
A loose lid that no longer fits properly should also be replaced. A secure lid helps keep the container clean and protects the starter during storage.
Many home bakers keep two matching jars on hand. This makes it easy to rotate between them during cleanings and always have a dry, ready to use container available.
Conclusion
A clean starter jar is one of the simplest ways to support a strong, reliable sourdough starter. Regular washing removes old buildup, makes feedings easier, and helps you monitor your starter’s growth with confidence.
The process does not require special equipment or complicated techniques. A consistent routine, clean utensils, and a well maintained container are enough to keep your starter in excellent condition.
Whether you bake every weekend or only a few times each month, taking a few extra minutes to care for your starter jar will pay off over time. Your starter will be easier to manage, your kitchen will stay cleaner, and you will be ready whenever it is time to bake another delicious loaf of homemade sourdough bread.
FAQS
Are you supposed to clean your sourdough starter jar?
Yes, you should clean your sourdough starter jar regularly to remove buildup and keep your starter healthy.
How to clean sourdough starter jar without clogging the drain?
Wipe leftover starter with a paper towel first, then wash the jar to avoid sending thick flour paste down the drain.
How do I clean the sides of my sourdough starter jar?
Soak the jar with warm water, then gently scrub the sides with a soft sponge or spatula to remove dried starter.
Do you need to sterilize a jar for sourdough starter?
No, regular washing with hot water and mild dish soap is enough for most sourdough starter jars.
What is the biggest mistake you can make with your sourdough starter?
The biggest mistake is neglecting regular feeding and cleanliness, which can weaken the starter and cause contamination.

Muhammad Ali writes about baking and recipes at kitchinfo. He researches techniques from trusted bakers, cookbooks, and culinary experts, and turns them into clear, step-by-step guides . so bakers of every skill level can get great results without the confusion.