

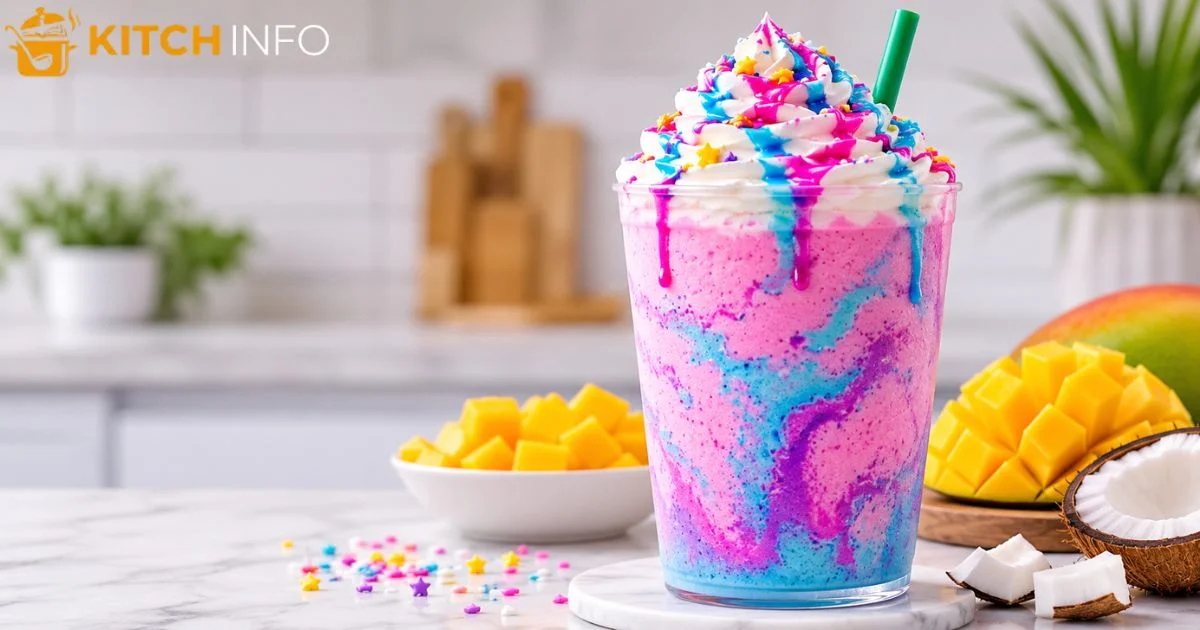
If you’re craving a colorful drink that feels like a special treat, this unicorn frappuccino recipe is an easy choice. Inspired by the famous Starbucks Unicorn Frappuccino, it combines a creamy vanilla base with fruity mango flavor, bright colors, and a tangy sour drizzle. The result is a fun homemade drink with a thick, smooth texture and a sweet and tart flavor contrast. You can prepare it with simple ingredients and a regular blender, making it perfect for parties, family treats, or a colorful weekend dessert. This recipe also lets you adjust the sweetness, thickness, and colors to suit your taste while creating a drink that looks just as exciting as it tastes.
What Is a Unicorn Frappuccino?
This unicorn frappuccino recipe is a colorful homemade drink inspired by the famous Starbucks Unicorn Frappuccino. It combines a creamy vanilla base with bright pink and blue colors, sweet fruit flavor, and a fun sour drizzle. The result is a thick, icy drink that looks almost too pretty to sip.
The original Unicorn Frappuccino became popular because it was very different from a regular coffee drink. It had no strong coffee flavor and focused instead on sweet, fruity, creamy, and sour flavors.
This homemade version keeps that playful character while using ingredients that are easy to find in American grocery stores. You can make it for a weekend treat, a birthday party, a summer gathering, or simply when you want something colorful at home.
The drink has a thick texture similar to a milkshake, but it is blended with plenty of ice. That gives it a cold, smooth consistency without making it feel as heavy as a traditional dessert.
The color is one of the most noticeable parts of the drink. A soft pink base is topped with bright blue accents, while the sour drizzle adds another layer of flavor and color.
You do not need professional equipment to make it. A regular kitchen blender, a small bowl, and a squeeze bottle are enough to create the main components.
The most important part is balancing the flavors. The drink should taste sweet and creamy first, with a light fruity note and a noticeable sour contrast from the topping.
Why This Unicorn Frappuccino Recipe Works
A good copycat drink is not only about matching the appearance. It also needs to recreate the contrast that made the original drink so memorable.
This copycat Unicorn Frappuccino works because every part has a clear purpose. The creamy base provides sweetness and body, while the colorful topping adds a sharp sour flavor.
The combination of mango frappuccino flavor and coconut creates a tropical taste without becoming too strong. Mango brings a bright fruity note, while coconut makes the drink feel smooth and creamy.
The sweet and sour contrast is especially important. Without it, the drink can taste like an ordinary colorful dessert. The sour element gives each sip a different flavor as you drink it.
Another reason this recipe works is the texture. Cold milk, ice, and vanilla ice cream create a thick base that blends easily and holds its color well.
The color also matters. A small amount of pink food coloring can turn the base into a soft pink shade. You can increase the amount slightly if you want a brighter appearance.
For the blue accents, neon blue food coloring creates the bold color associated with the drink. Use it carefully because a tiny amount can create a strong shade.
The recipe also gives you control over sweetness. If you prefer a milder drink, you can use less sweetener. If you are making it for children or a party, you can make the colors brighter and the flavor sweeter.
The homemade approach also lets you adjust the thickness. More ice creates a thicker drink, while a little extra milk makes it easier to blend.
Understanding the Flavor Balance
The base should be creamy and sweet rather than sharply fruity. The fruit flavor should sit behind the creamy texture instead of taking over the entire drink.
The topping is where the stronger contrast comes in. A small amount of sour blue flavoring gives the blue mixture its tangy character.
You can also use blue Fun Dip to create a familiar sweet and tart taste. It works particularly well when you want the topping to have both color and flavor.
The goal is not to make the entire drink sour. Instead, the sour component should appear in small amounts so that it creates contrast with the sweet base.
This balance is what makes the drink enjoyable instead of overwhelming. Each ingredient has a simple role, and keeping those roles separate helps the final drink taste more interesting.
Choosing the Right Texture
Texture can make or break a blended drink. Too much liquid can make the frappuccino thin, while too much ice can leave it chunky.
Start with the recommended amount of liquid and blend until the mixture becomes smooth. If the blades struggle, add a small splash of milk instead of adding a large amount at once.
A thick drink should move smoothly around the blender jar. It should not look watery, but it should still be easy to pour.
Using vanilla ice cream helps create a rich texture and gives the drink a soft vanilla flavor. This also makes the recipe easier because you do not need to build a complicated creamy base from scratch.
Ingredients You’ll Need
The ingredients for this recipe can be divided into three simple groups. You need ingredients for the creamy pink base, ingredients for the sour topping, and ingredients for finishing the drink.
Ingredients for the Creamy Base
You will need milk, vanilla ice cream, mango flavoring, coconut syrup, ice, and a small amount of pink coloring.
Coconut syrup adds a smooth tropical sweetness. If you prefer a more natural coconut taste, coconut puree can also be used, although it may slightly change the texture.
Mango flavoring provides the fruity character. You can use a small amount at first and add more after tasting the mixture.
For extra sweetness, a little condensed milk can be added to the base. It also contributes to the creamy mouthfeel.
Some versions use evaporated milk for additional richness. It has a concentrated dairy flavor without being as sweet as condensed milk.
You may also see recipes that use mango juice instead of concentrated mango flavoring. This gives the drink a lighter fruit taste and adds more liquid to the mixture.
For a stronger visual effect, add the pink color gradually. The mixture may look pale at first, but the color usually becomes more noticeable after blending.
Ingredients for the Sour Topping
The blue topping needs a sweet base combined with a sour ingredient and bright coloring.
You can prepare a simple syrup mixture and combine it with citric acid for the tart flavor. Add the acid slowly because a small amount can make a noticeable difference.
A little blue sour mix can also provide both color and sour flavor, depending on the product you choose.
For the color, food dye can be added one drop at a time. The exact amount depends on the type and strength of the coloring.
If you want the topping to taste more like a candy style drizzle, Fun Dip can be mixed into the syrup. This creates a playful flavor that works well with the sweet base.
Ingredients for the White Drizzle
The white drizzle adds sweetness and helps create the layered appearance associated with the drink.
White chocolate works well because it melts smoothly and provides a rich sweet flavor. You can also use white chocolate sauce if you prefer a ready made option.
A small amount of coconut oil can help loosen melted chocolate and make it easier to drizzle. Do not add too much because the mixture can become oily.
If you are making a thicker drizzle, you can use powdered sugar to adjust the consistency. The mixture should be thick enough to cling to the cup without becoming difficult to squeeze.
Simple Ingredient Guide
| Component | Main Ingredients | Purpose |
|---|---|---|
| Pink base | Milk, vanilla ice cream, mango flavoring, coconut syrup | Creates the creamy body |
| Fruit flavor | Mango flavoring or mango juice | Adds fruity sweetness |
| Pink color | Pink food coloring | Creates the main color |
| Blue drizzle | Simple syrup, citric acid, blue coloring | Adds sour contrast |
| White drizzle | White chocolate or white chocolate sauce | Adds sweetness and visual contrast |
| Topping | Whipped cream | Finishes the drink |
You can also use fresh mango slices as a simple garnish if you want a fruity presentation. Keep the amount small so the garnish does not make the drink difficult to enjoy.
How to Make the Blue Sour Drizzle

The blue sour drizzle is one of the most important parts of the recipe because it gives the drink its signature contrast.
Start by preparing a small amount of simple syrup. The mixture should be smooth and easy to pour.
Add a small amount of citric acid and stir thoroughly. Taste a tiny amount before adding more. The flavor should be tangy but not so sharp that it becomes unpleasant.
Next, add your blue coloring. Use only a small amount at first. Stir well and check the shade before adding more.
If you are using blue Fun Dip, add it gradually. The powder can intensify both the color and the sour candy flavor.
The finished mixture should be bright blue and slightly thick. It should move easily through a squeeze bottle without becoming watery.
Making the Drizzle Smooth
If your mixture contains melted ingredients, warm them gently rather than exposing them to high heat.
For a chocolate based drizzle, a double boiler can help melt the chocolate evenly. Keep the heat low and stir until the mixture becomes smooth.
Avoid adding water directly to melted chocolate. Even a small amount can cause the chocolate to seize and become thick and grainy.
Once the mixture reaches the right consistency, transfer it carefully to a squeeze bottle.
If the drizzle feels too thick, allow it to cool slightly and test it again. If it is still difficult to squeeze, thin it very gradually.
The finished drizzle should create thin lines rather than one heavy layer. This gives the drink a more attractive appearance and spreads the sour flavor throughout the cup.
How to Store the Drizzle
If you prepare the drizzle before making the drink, place it in a sealed container and keep it in the refrigerator when the ingredients require chilling.
Before using it, allow the mixture to soften enough to become pourable. Give it a good stir so the color and flavor are evenly distributed.
Do not prepare a large amount unless you plan to use it soon. A fresh drizzle usually gives the best texture and appearance.
How to Make the Unicorn Frappuccino
Once the blue sour drizzle is ready, you can prepare the creamy drink.
Start by adding milk to the blender. Add vanilla ice cream, mango flavoring, coconut syrup, and ice.
Blend the ingredients until smooth. Stop the blender and check the texture.
If the mixture looks too thick, add a small amount of milk. If it looks too thin, add a little more ice and blend again.
The finished base should be thick, creamy, and smooth. You should not see large pieces of ice.
Next, add the pink coloring. Start with a small amount and blend briefly. Check the shade before adding more.
A soft pink color usually works best because it leaves enough contrast for the blue drizzle. If the color becomes too dark, it can make the drink look purple rather than pink.
Adding the Flavor
Taste the blended base before pouring it into the glass.
If you want more mango flavor, add a little more mango flavoring. If you want stronger coconut notes, add a small amount of coconut syrup.
For additional sweetness, you can add a little powdered sugar. Blend again briefly so the sugar dissolves completely.
The drink should taste creamy and sweet with a light tropical fruit character. The sour flavor should come mainly from the topping rather than the base.
Creating the Colorful Cup
Before pouring the drink, squeeze a small amount of the blue sour drizzle inside the glass.
Move the bottle slowly around the inside walls of the cup. You do not need to cover every part of the glass.
Pour the pink frappuccino base into the cup slowly. The blue drizzle will remain visible against the pink drink.
Add another small amount of blue drizzle over the top if desired.
Finish with whipped cream for a soft, creamy topping. You can add a little more colorful drizzle over the whipped cream for a brighter presentation.
If you want additional visual contrast, use a small amount of purple coloring in the topping. Keep it subtle so the pink and blue remain the dominant colors.
Getting the Best Final Texture
The drink is best served immediately after blending. As it sits, the ice begins to melt and the texture becomes thinner.
For the thickest result, chill the serving glass before preparing the drink. A cold glass helps the frappuccino stay chilled for longer.
Do not overblend once the mixture is smooth. Excessive blending can warm the drink and melt some of the ice.
If you are making several servings, prepare each batch separately when possible. A blender works best when it has enough room for the ingredients to circulate properly.
The final drink should be thick enough to support a straw while remaining smooth enough to sip easily.
At this stage, the colorful base, blue sour drizzle, and creamy topping are ready. The next steps can build on this foundation with additional preparation and serving details.
How to Assemble the Unicorn Frappuccino
Now that the drink base and toppings are ready, assembly is quick. The order matters because each layer should stay visible in the finished drink.
Start with a clean, chilled serving glass. Spoon a small amount of the blue sour mixture around the inside of the glass.
Do not use too much. Thin streaks create a better contrast and prevent the tart flavor from overpowering the creamy drink.
Slowly pour the pink mixture into the glass. Pouring against the side of the glass helps reduce splashing and keeps the layers neat.
Add a little more blue mixture over the top. You can make a simple swirl or create several small streaks for a more colorful look.
Next, add a generous spoonful of whipped cream. Keep it slightly below the rim so there is enough room for the final decoration.
Drizzle the remaining blue mixture over the whipped cream. You can also add a little melted white chocolate for a creamy finish.
Serve the drink immediately with a wide straw. The cold texture and colorful layers are best when enjoyed fresh.
Recipe Tips for the Best Results
Small changes during preparation can make a big difference in the final drink. The most important tip is to work with cold ingredients whenever possible.
Cold ingredients help maintain the thick texture. They also reduce the chance of the ice melting too quickly during blending.
Balance the Sweet and Sour Flavors
The sweet base should always be stronger than the sour topping. If the topping tastes extremely tart on its own, use less of it when assembling the drink.
Taste the mixture before serving. This gives you a chance to adjust the flavor without changing the whole recipe.
Remember that the topping is meant to provide contrast. It should add excitement to each sip rather than dominate the entire drink.
Add Color Slowly
Food coloring becomes stronger as you add more. Start with a very small amount and blend before deciding whether more is needed.
This is especially useful when working with strong neon colors. Too much coloring can make the final drink look darker than expected.
For a soft pastel appearance, stop as soon as the base reaches a light pink shade.
Keep the Ice Under Control
Ice is important for creating a thick texture, but too much can make the drink difficult to blend.
If the mixture becomes too thick, add a small splash of milk. If it becomes too thin, add a little more ice and blend briefly.
Avoid leaving the finished drink at room temperature for a long time. Melting ice will quickly change both the texture and flavor.
Prepare the Glass First
Have your glass ready before blending the base. Once the drink is smooth, you want to pour it immediately.
You can place the serving glass in the freezer for several minutes before making the drink. A cold glass helps the finished beverage stay thick and chilled.
Easy Shortcuts and Substitutions
You do not need every ingredient to make a fun homemade version. Several simple swaps can save time while keeping the main flavor and appearance.
If you do not have mango flavoring, mango nectar can provide a mild fruity taste. Use a small amount so the extra liquid does not make the base too thin.
For the coconut element, coconut flavored creamer can be used instead of a concentrated coconut ingredient. Reduce the amount of regular milk slightly when making this substitution.
If you do not want to prepare a homemade sour topping, a ready made tart candy syrup can work. Choose one with a flavor you enjoy because the topping will remain noticeable in every sip.
A prepared dessert sauce can also replace homemade melted chocolate. This is especially useful when you want to assemble the drink quickly.
For a lighter version, reduce the amount of ice cream and use additional milk. The result will be less rich but still cold and creamy.
You can also skip fresh fruit garnish when you want the quickest preparation. The colorful layers already provide plenty of visual appeal.
If you are serving several people, prepare the ingredients ahead of time. Keep the liquid components chilled and blend the base shortly before serving.
These substitutions are useful for busy families, birthday parties, and casual summer gatherings when you want the look of a specialty café drink without spending too much time in the kitchen.
How Close Is This Recipe to the Original?
This homemade version is designed to capture the main qualities people remember from the original Starbucks drink. It focuses on the colorful appearance, creamy texture, fruity sweetness, and tart contrast.
It is not an exact formula because the original commercial preparation used proprietary ingredients and flavor blends. Those ingredients are not available in the same form for a typical home kitchen.
The biggest similarity comes from the flavor structure. The creamy base provides sweetness while the colorful topping adds a sharp contrast.
The visual effect is also very close. Pink, blue, and white layers create the playful appearance that made the original so recognizable.
The homemade version gives you more control, though. You can make it sweeter, less sweet, thicker, thinner, or more tart depending on your preference.
You can also control the intensity of the colors. This makes the recipe useful when serving children or guests who prefer a softer appearance.
The result should be thought of as a homemade interpretation rather than an exact restaurant formula. It captures the fun character of the original while using practical ingredients and simple kitchen methods.
Frequently Asked Questions About Unicorn Frappuccino
Does a Unicorn Frappuccino contain coffee?
This style of drink does not need coffee. Its main appeal comes from the creamy, fruity, sweet, and tart flavor combination.
That makes it a useful choice when you want a colorful café style treat without a strong coffee taste.
Can I make it less sweet?
Yes. Reduce the sweet ingredients in the creamy base and use less topping.
The easiest approach is to adjust the sweetness after blending. This lets you find the level that tastes right without changing the entire recipe.
Can I make the drink without ice cream?
Yes. You can replace some of the richness with additional milk and a small amount of sweetener.
The texture will be lighter and less dessert like, but the drink can still be smooth and refreshing.
Why did my drink turn purple?
Pink and blue colors can blend together and create purple. This usually happens when too much blue coloring or topping is added to the pink base.
Use smaller amounts and keep the blue mixture mostly on the surface and inside the glass rather than mixing it completely into the drink.
How can I make the colors brighter?
Add coloring gradually until you reach the shade you want. Strong coloring products usually require only a tiny amount.
A white and creamy base also helps bright colors stand out more clearly.
Can I prepare it ahead of time?
The toppings can be prepared earlier, but the blended drink is best made shortly before serving.
As the drink sits, the ice melts and the texture becomes thinner. For the best result, assemble it immediately after blending.
Can I make this for a party?
Yes. This recipe works especially well for birthdays, summer gatherings, and other casual celebrations.
Prepare the toppings beforehand, then blend the base in batches. Let guests choose how much tart topping they want.
How do I make the drink thicker?
Use slightly more ice or a little more ice cream. Blend only until the mixture becomes smooth.
Adding too much liquid is the most common reason a blended drink becomes thin, so add milk gradually.
Final Thoughts
This homemade Unicorn Frappuccino is a fun way to recreate a colorful café style treat in your own kitchen. The recipe works because it combines a smooth creamy base with bright colors and a tart topping.
The best results come from keeping the drink cold, adding color slowly, and balancing the sweet and sour flavors carefully.
Once you understand those simple steps, you can easily adjust the recipe to match your own taste. Make it sweeter for a dessert style treat, or use less topping for a milder flavor.
Most importantly, enjoy the process. The colorful layers make this drink feel special, even though the preparation is simple. With a few basic ingredients and a blender, you can create a playful homemade treat that looks impressive and tastes even better.

Muhammad Ali writes about baking and recipes at kitchinfo. He researches techniques from trusted bakers, cookbooks, and culinary experts, and turns them into clear, step-by-step guides . so bakers of every skill level can get great results without the confusion.