

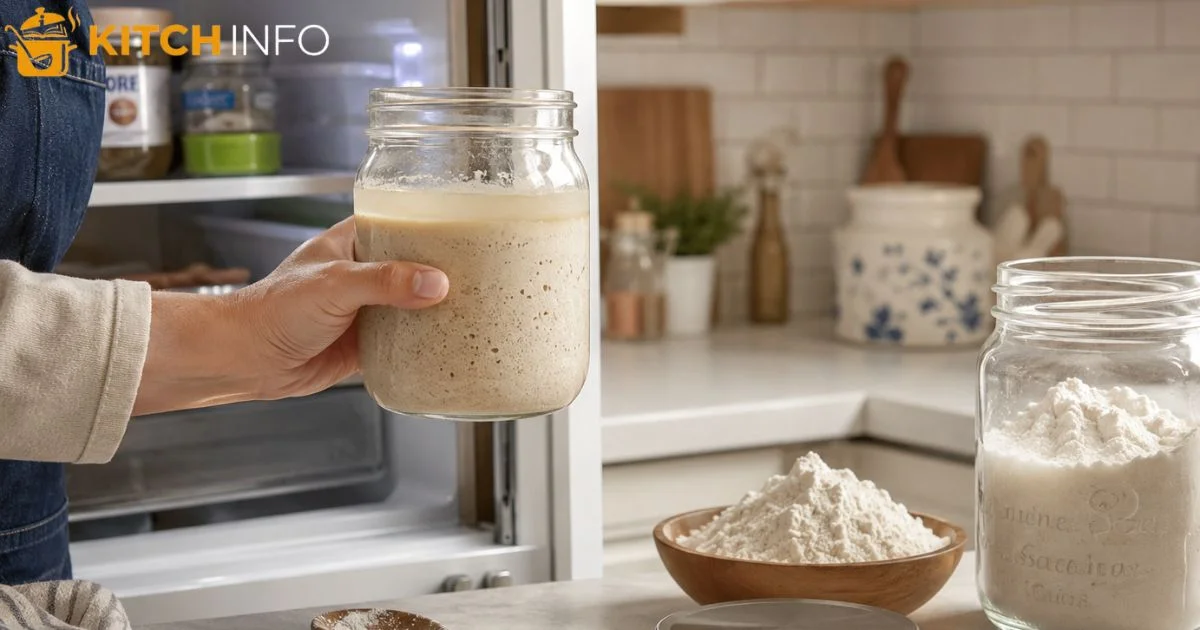
How to Revive Sourdough Starter From Fridge is a common question for home bakers who want to bring their sourdough starter back to life after cold storage. The simple answer is to let the starter warm to room temperature, discard a portion, and feed it regularly with flour and water until it becomes active and doubles in size. A healthy starter should develop bubbles, rise consistently, and have a pleasant sour smell before baking. Whether your starter has been in the fridge for a few days or several weeks, proper care and patience can restore its strength. This guide explains the easiest way to revive your starter and get it ready for delicious homemade sourdough bread.
Signs Your Starter Needs Reviving

A starter fresh from the fridge almost never looks the same as one sitting on the kitchen counter. Some changes are completely normal, while others tell you that the culture needs extra attention before baking.
Knowing the difference helps you avoid throwing away a perfectly good starter.
It Has Very Few Bubbles
One of the first things you may notice is the lack of activity.
A healthy starter stored at room temperature usually shows plenty of bubbles throughout the mixture. After refrigeration, those bubbles often disappear because the microorganisms have slowed down.
Do not worry if your starter looks quiet. That does not mean it is dead.
It Does Not Rise
A healthy culture should eventually doubles in size after feeding.
If your starter barely changes after sitting on the counter for several hours, it likely needs several rounds of feeding before it regains enough strength for baking.
A Layer of Liquid Appears
Sometimes a dark liquid forms on top of the starter. This liquid is commonly called hooch.
It develops when the microorganisms have consumed most of the available food. It is simply a sign of a hungry starter, not an automatic reason to throw everything away.
You can either pour the liquid off or stir it back into the mixture before feeding. Either method works, although pouring it away usually produces a milder flavor.
The Surface Looks Gray
A thin gray top layer often appears after long refrigeration.
Unlike colorful mold, this gray coating is usually harmless. Simply remove it if desired and continue the recovery process.
The Smell Has Changed
A healthy culture often develops a pleasantly sour smell.
After spending weeks in the refrigerator, it may also produce a stronger tangy aroma or even a mild yeasty aroma. These smells are generally normal during storage.
A truly unpleasant smell that resembles rotting food is different and deserves closer inspection.
The Texture Feels Different
A healthy starter should resemble thick pancake batter after feeding.
Stored starters sometimes separate or become thinner. Others become stiff because moisture evaporates over time.
After one or two proper feedings, the texture usually returns to normal.
Look for Mold
The biggest warning sign is mold.
Green, black, pink, orange, or fuzzy patches usually mean the culture has experienced contamination. In that case, it is safest to discard the starter completely and begin with a new one.
Although this situation is uncommon, always use your senses before attempting recovery.
How to Revive Sourdough Starter From Fridge
Reviving a chilled starter is mostly about rebuilding strength little by little. Patience matters more than speed.
The following step by step system works well for most refrigerated cultures.
Step One
Remove the refrigerated starter from the fridge.
Allow it to sit at room temperature for about one hour before feeding. This gentle warming helps the microorganisms become active again.
Avoid placing the jar in direct sunlight because excessive heat can stress the culture.
Step Two
Choose a clean glass jar or another clean jar if the original container has dried starter stuck to the sides.
A clean container reduces the risk of unwanted bacteria and makes it much easier to watch the starter grow.
Step Three
If liquid has formed on top, decide whether to pour it off or stir it in.
Neither choice is wrong.
Removing the liquid usually creates a milder flavor, while mixing it back in can produce a slightly more sour taste later.
Step Four
Measure out a small amount of starter.
Using a smaller amount allows fresh flour and water to refresh the microorganisms more effectively than feeding a very large quantity.
Step Five
Feed the starter using filtered water or spring water whenever possible.
Many bakers avoid chlorinated water because chlorine may reduce microbial activity in some areas.
Pay attention to water temperature as well.
Use slightly warm water, not hot water. Water that feels comfortably warm to your hand is usually a good choice.
Step Six
Choose quality flour.
Many bakers find that whole wheat flour provides extra nutrients during recovery because it contains more natural minerals.
Others combine it with all purpose flour to create a balanced feeding.
Some experienced bakers also enjoy using freshly milled flour, although it is not required for successful recovery.
Step Seven
Mix everything until the texture becomes smooth and even.
The mixture should have a familiar batter consistency without dry flour remaining.
Step Eight
Place the jar in a warm location in your kitchen.
Temperatures around typical indoor room warmth often encourage faster activity than a cold countertop during winter.
Step Nine
Wait and observe.
The first feeding may show very little change. That is completely normal.
Many starters need several feedings before they begin showing strong activity again.
Step Ten
Repeat the process according to a consistent feeding schedule.
Each feeding strengthens the culture and increases the population of healthy microorganisms.
Eventually you should notice more bubbles, better growth, and stronger fermentation.
What You Should See During Recovery
As recovery progresses, the starter begins changing in predictable ways.
Small bubbles appear first.
Later, visible air pockets develop throughout the mixture.
The starter rises higher after each feeding.
Its smell becomes cleaner.
The texture becomes smoother.
Eventually it becomes a bubbly starter that is ready for bread making.
When Is It Ready for Baking?
A recovered starter should rise reliably after feeding and hold that growth for several hours.
More importantly, it should help dough rise predictably every time you bake.
When those signs appear consistently over multiple feedings, the starter is usually ready to use for fresh bread dough, pizza crust, sandwich loaves, or even fluffy pancakes.
Best Feeding Ratios for Recovery

Feeding ratio simply means how much starter, flour, and water you use during each feeding.
Choosing the right balance can make recovery faster and more reliable.
Why Ratios Matter
A neglected culture contains less available food.
Adding enough fresh flour and water gives the microorganisms room to multiply again.
This gradually creates a healthier starter with stronger fermentation.
A Balanced Starting Ratio
Many home bakers begin recovery with equal weights of starter, flour, and water.
This balanced approach works well for most refrigerated cultures because it provides enough fresh nutrients without overwhelming the existing microorganisms.
If activity remains slow after several feedings, increasing the amount of fresh flour and water can sometimes improve results.
Should You Throw Some Away?
Yes.
Most recovery methods use the discard method.
Before each feeding, discard half of the mixture.
Keeping only a smaller amount prevents the jar from becoming too large while allowing the fresh flour to nourish the remaining culture more effectively.
The portion that is removed becomes sourdough discard, which can later be used in recipes instead of being wasted.
How Often Should You Feed?
Frequency depends on how inactive the starter has become.
For many cultures, feeding every 12 to 24 hours works well during the first stage of recovery.
Once activity increases, some bakers switch to feed every 12 hours for faster strengthening.
After the starter fully recovers, maintenance becomes much easier.
People baking weekly often return the starter to the refrigerator and simply feed once a week to maintain strength between baking sessions.
Stay Consistent
Changing feeding amounts every time makes it difficult to judge progress.
Using the same ratio for several feedings allows you to clearly see whether the culture is improving.
Consistency is one of the biggest reasons successful bakers achieve reliable results.
How Long Does It Take to Become Active Again?

The answer depends on the condition of the starter before refrigeration and how long it remained there.
Fortunately, most starters recover faster than people expect.
A Starter Stored for One Week
A recently chilled culture often wakes up after one or two feedings.
Many are ready for baking within a day.
A Starter Stored for Several Weeks
If the starter remained refrigerated for several weeks, expect recovery to take between two and four days.
Daily observation is more important than watching the calendar.
Look for stronger growth after each feeding instead of focusing only on time.
A Long Neglected Starter
A long neglected starter may require additional patience.
Several consecutive feedings may be necessary before the culture regains enough strength for reliable baking.
As long as there are no signs of mold or serious spoilage, recovery is often still possible.
What Affects Recovery Time?
Several factors influence how quickly your starter wakes up.
The flour you choose.
Kitchen temperature.
Water quality.
The starter’s age.
How long it remained refrigerated.
The consistency of your feeding routine.
All of these work together to determine recovery speed.
Avoid Rushing the Process
Many beginners become discouraged when the starter does not become highly active after the first feeding.
Recovery is a gradual rebuilding process.
With regular care and patience, the microorganisms continue multiplying until the culture becomes dependable again.
Common Problems During Revival

Even experienced bakers occasionally encounter problems while reviving a chilled starter.
Most issues are easy to fix once you understand what caused them.
The Starter Is Not Rising
If there is little or no rise after feeding, the starter may simply need additional time.
Continue regular feedings without making dramatic changes after every attempt.
Stable conditions usually produce better recovery than constant adjustments.
The Starter Smells Too Strong
Sharp smells often appear during recovery.
As fresh flour becomes available, the odor usually becomes cleaner over the next several feedings.
A healthy culture should eventually smell pleasantly fermented instead of harsh.
The Starter Looks Watery
Separation can happen after refrigeration.
Mix thoroughly during feeding and maintain the same hydration each time.
The texture normally improves after consistent care.
Recovery Seems Slow
Slow recovery is common during cooler weather.
Keeping the starter comfortably warm often speeds fermentation naturally.
Avoid excessive heat because temperatures that are too high can weaken the microorganisms instead of helping them.
The Starter Keeps Changing Texture
Small texture changes during rehydrating sourdough starter are completely normal.
Focus on overall improvement instead of expecting every feeding to look exactly the same.
Steady progress is a much better sign than perfect appearance.
You Are Unsure Whether to Start Over
Most refrigerated starters recover successfully with proper care.
Only obvious mold, unusual colors, or clear signs of serious contamination usually justify replacing the culture with a starter from scratch.
Mistakes That Slow Down Recovery
Reviving a refrigerated starter is usually straightforward, but a few common mistakes can make the process take much longer. Avoiding these problems will help your starter regain strength more quickly and give you better baking results.
Feeding Too Soon or Too Late
Timing matters during recovery.
If you feed the starter before it has had a chance to become active, you may dilute the growing yeast population. Waiting far too long between feedings can also leave the culture without enough food.
Watch how your starter behaves instead of following the clock alone.
Using Incorrect Measurements
Eyeballing ingredients may work for experienced bakers, but using a kitchen scale provides much more consistent results.
Accurate measurements help create a stable environment where the starter can recover at a steady pace.
Keeping It in a Cold Kitchen
Temperature plays a major role in fermentation.
If your kitchen is unusually cool, recovery will naturally take longer. Placing the jar in a comfortably warm area can make a noticeable difference without exposing it to excessive heat.
Switching Flours Constantly
Changing flour with every feeding makes it difficult to judge how your starter is responding.
Choose one type of flour during recovery and stay with it until the starter becomes strong again.
Expecting Instant Results
One of the biggest mistakes is assuming the starter should be ready after a single feeding.
Every culture recovers at its own pace. Some become active within a day, while others need several days of regular care. Staying patient usually produces the best outcome.
Using a Dirty Container
Old dried starter around the rim of a jar can attract unwanted microorganisms over time.
Washing the container regularly helps create a cleaner environment and makes it easier to monitor your starter’s progress.
How to Know Your Starter Is Ready for Baking
A starter should be strong enough to raise dough consistently before you use it in a recipe. Looking for a few reliable signs is much better than relying on guesswork.
It Rises Well After Feeding
A healthy starter should expand noticeably after being fed.
The rise should happen within a reasonable amount of time and remain stable before the starter gradually begins to fall again.
It Is Full of Small Bubbles
The mixture should have bubbles throughout rather than only on the surface.
This shows that fermentation is happening evenly inside the jar.
It Smells Fresh
A mature starter should have a clean, pleasantly fermented smell.
It should not have odors that seem rotten or unusually harsh.
It Has a Light Texture
When stirred, the starter should feel airy instead of heavy.
This light texture is another sign that enough gas has developed to help bread rise properly.
Try a Small Test Bake
If you are unsure whether the starter is fully ready, make a simple loaf or a small batch of rolls before preparing a larger recipe.
A successful test bake gives you confidence that your starter has recovered completely.
Tips to Keep Your Starter Healthy in the Fridge

Once your starter has fully recovered, proper storage will make future baking much easier.
Good maintenance also reduces the amount of time needed to wake it up before your next baking session.
Refrigerate Only After It Becomes Active
Allow the starter to become active after feeding before placing it back in the refrigerator.
This gives the yeast enough food to continue working slowly during storage.
Use a Container With Room to Expand
Even in the refrigerator, the starter may continue growing for a short time.
Leave extra space in the jar to prevent overflow.
Feed Before Long Storage
If you know you will not bake for several weeks, feed the starter before refrigerating it.
Starting storage with a well fed culture helps it remain stronger over time.
Check It Occasionally
You do not need to open the jar every day.
However, checking it every week or two allows you to spot any unusual changes early.
Label the Date
A simple label with the feeding date makes it easy to remember when the starter was last refreshed.
This small habit prevents long periods of neglect.
Build a Routine
Whether you bake every weekend or only once each month, following a regular routine keeps your starter dependable.
Consistent care is much easier than trying to revive a severely neglected culture later.
Conclusion
Learning how to revive sourdough starter from fridge is a valuable skill for anyone who enjoys baking at home. Most refrigerated starters can return to full strength with regular feedings, proper temperature, and a little patience.
Instead of worrying when your starter looks quiet after refrigeration, focus on the signs of healthy recovery. A steady rise, an even bubbly texture, and a fresh fermented smell all indicate that the culture is becoming strong again.
Once your starter is active, keeping it healthy is much easier than bringing it back from long neglect. A simple maintenance routine, clean storage, and regular feeding will help ensure it is always ready whenever you want to bake fresh sourdough bread for your family.
With the techniques covered in this guide, you can confidently revive your refrigerated starter, maintain it for the long term, and enjoy consistent baking results every time.
FAQS
How do I wake up my sourdough starter from the refrigerator?
Let it reach room temperature, then feed it until it becomes bubbly and doubles in size.
How can I revive a sourdough starter that I discarded from the fridge?
Keep a small portion, feed it with fresh flour and water, and repeat until it becomes active.
How do I use my sourdough starter after it has been in the fridge?
Feed it first and use it only after it rises well and becomes fully active.
How long does it take to revive a sourdough starter from the fridge?
Most sourdough starters become active again within 1 to 3 days with regular feedings.
How long after feeding sourdough starter can I put it in the fridge?
Wait until it becomes active after feeding, usually about 2 to 4 hours, before refrigerating it.

Muhammad Ali writes about baking and recipes at kitchinfo. He researches techniques from trusted bakers, cookbooks, and culinary experts, and turns them into clear, step-by-step guides . so bakers of every skill level can get great results without the confusion.